Restoration
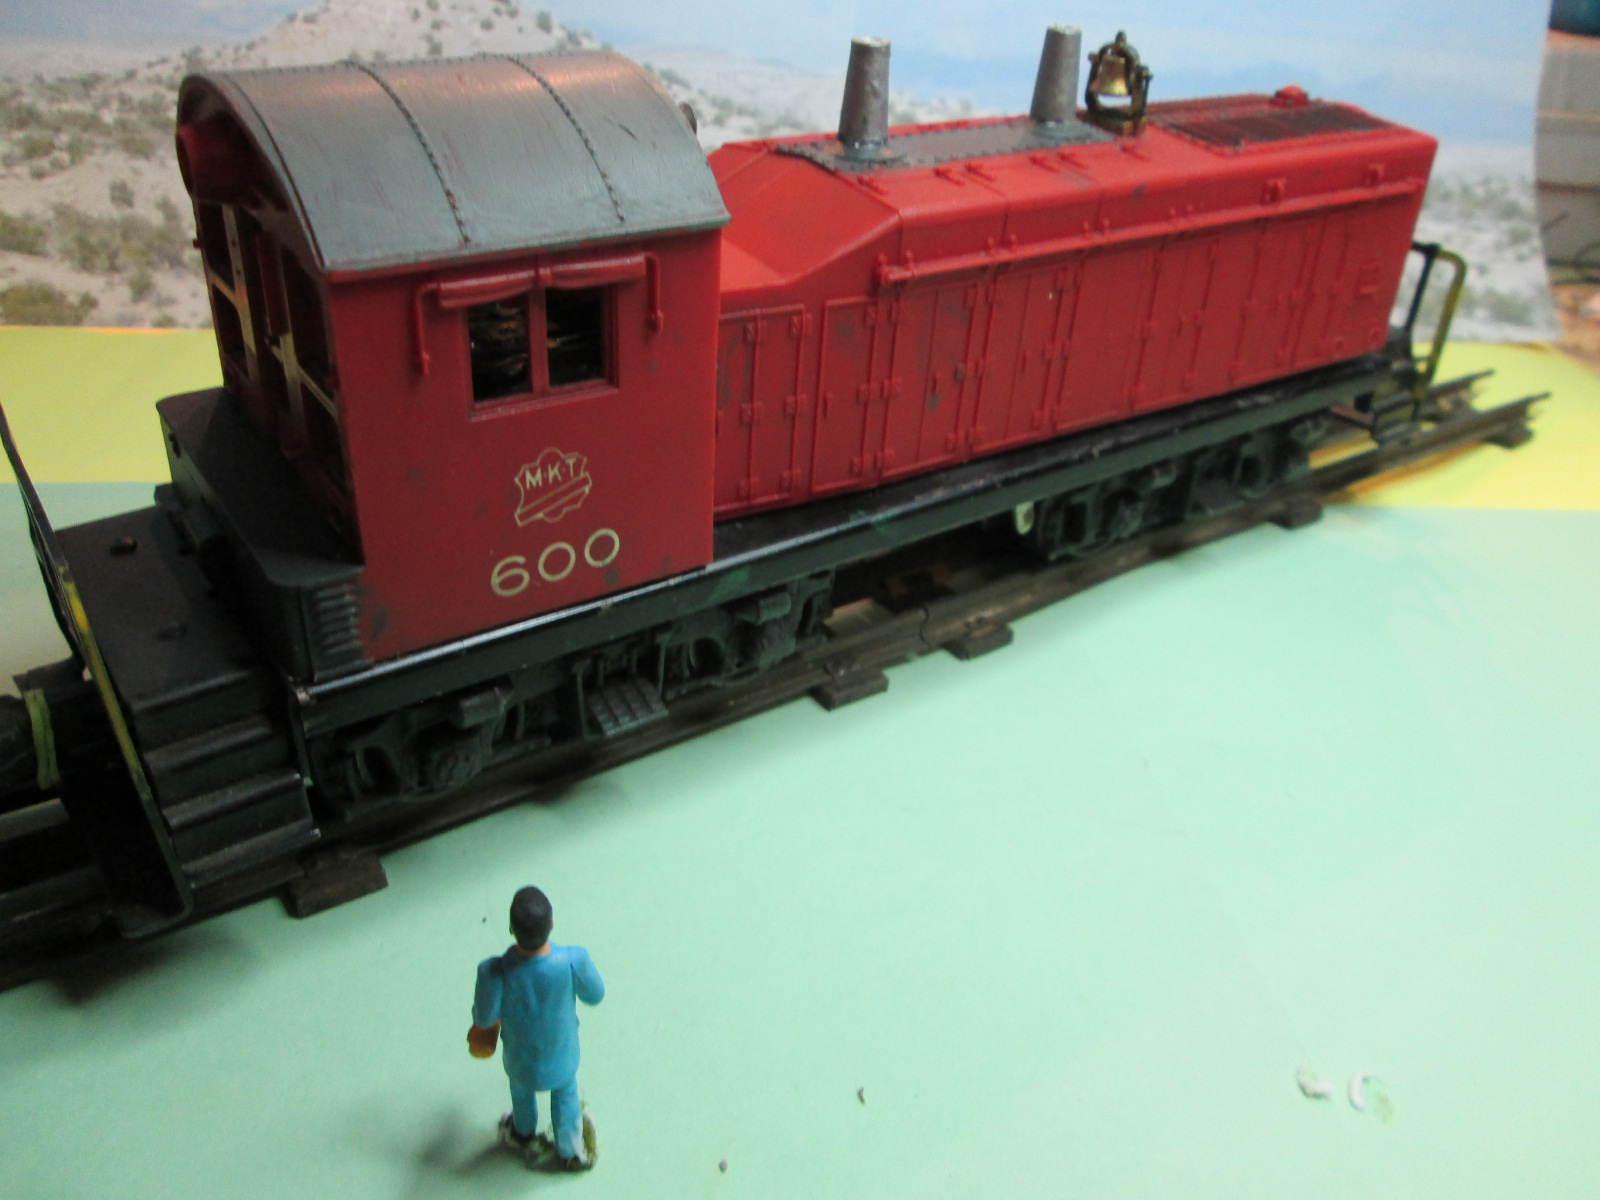
I recently obtained from Trainz® (Buford, GA) through an eBay® sale, an NW-2 switcher, in O scale, a Lionel production unit. Placing it on the O-27 track, and applying power, it barely moved. It looked in good condition for being 65 years old. Cleaning the center pick-up rollers (Collectors) and all metal wheels w/ cotton swabs, dipped in electrical contact cleaner, got it moving.
Electrical Repairs
I noticed it derailed on those tight curves. Removing the one screw below the headlight (front of the plastic hood/ shell) and lifting it backwards to disengage the rear clip; I examined it closer, as well as, rotating the rear power truck. I noticed it was binding on the steel frame. Applying oil on the truck rear drive assembly, where it rotated on the steel frame, fixed that problem. Going on-line and searching for “Lionel 600 switcher” got me to the Lionel service manual in a .pdf format.
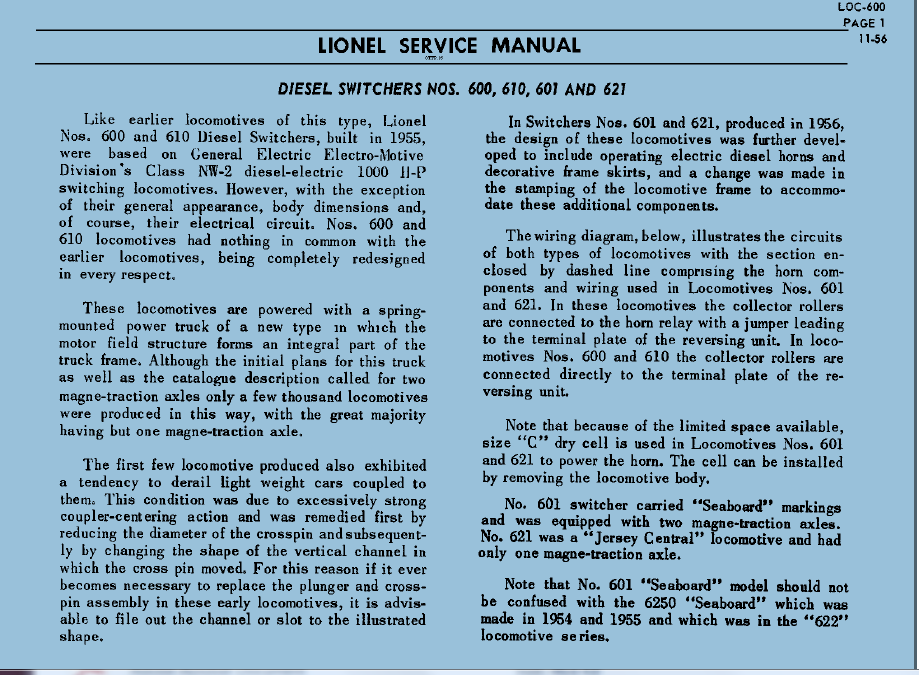
Reading, I noticed it had Magne-traction on the rear wheel drive assembly. Holding a screwdriver next to a geared driver wheel, it attracted the steel screwdriver. The rear wheel assembly was magnetized to attract the steel wheels to the steel track for better traction. Wow, it’s still working 65 years later!
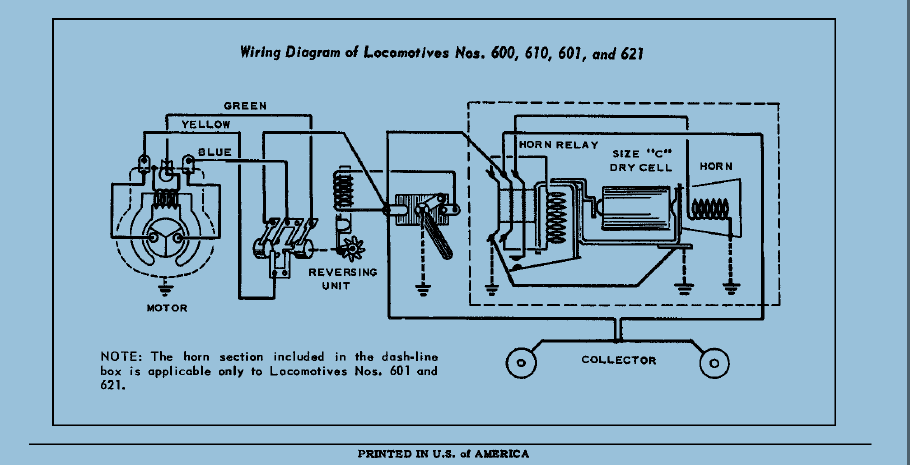
One can see how the Reversing Unit (aka, E-Unit) changes the wiring to the 3 pole 18VAC motor, so as to change field and armature windings current flow.
I noted that some models came w/ an incandescent bulb in the front hood opening for a light. I had a scrap piece of hardware w/ a full wave bridge (FWB) rectifier, and terminal strip bracket already in the scrap box. Using the existing 4 solder terminal strip, I mounted it to an existing hole in the steel chassis, toward the front hood section, using a 4-40 bolt and nut/lock-washer. It provided the return side for the AC to the FWB assembly.
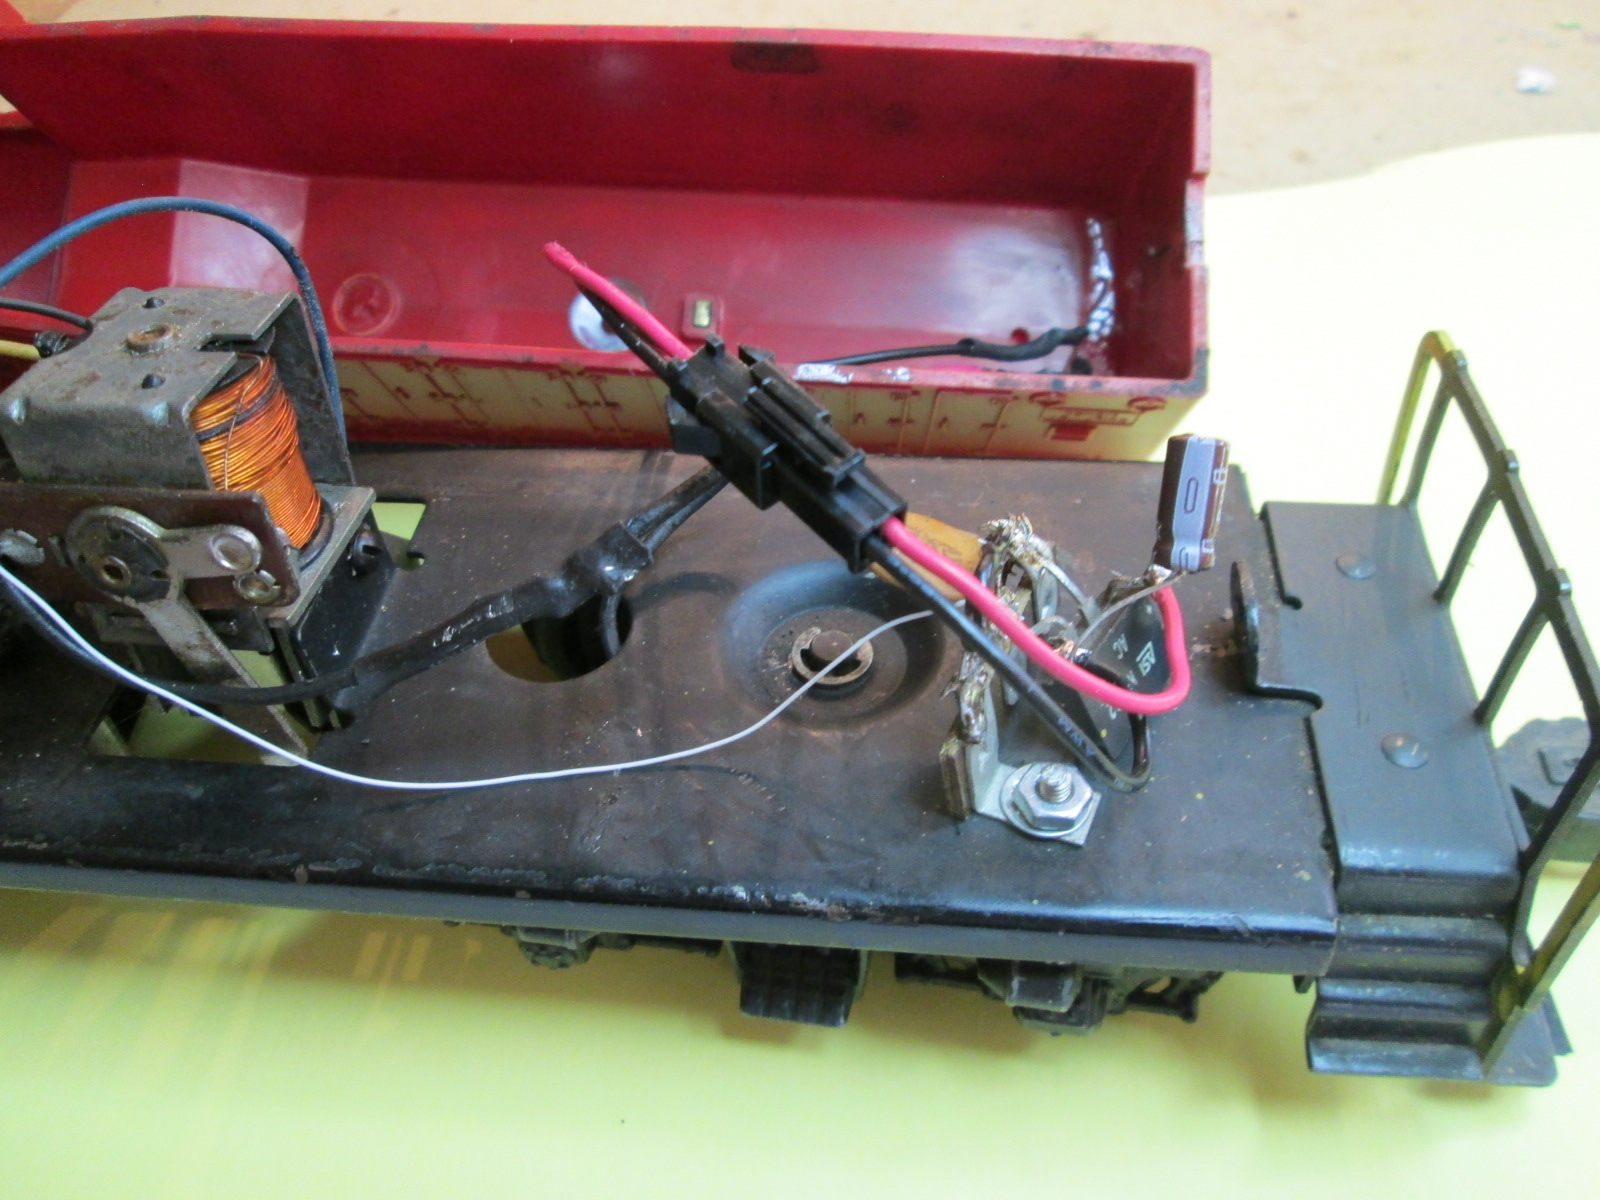
A white insulated 30 AWG wire was soldered to the reversing unit, where that center rail (Collector) feed wire was attached (high side AC), then to the other AC input of the FWB. Adding a 4.7 ufd/50VDC capacitor across the + and – leads of the rectifier, and wiring the + side output through a dropping resistor of 8.2K ohms, so as to feed the bright white LED mounted in the hood light opening, was also accomplished. A jumper cable with a polarity formed connector was installed between the return side of the rectifier (black lead) as well as the high side (+ red lead) from the resistor to the + side of the rectifier. This allowed removal of the hood and cab plastic body from the heavy steel chassis with a quick disconnect electrical connector for servicing.
Paint
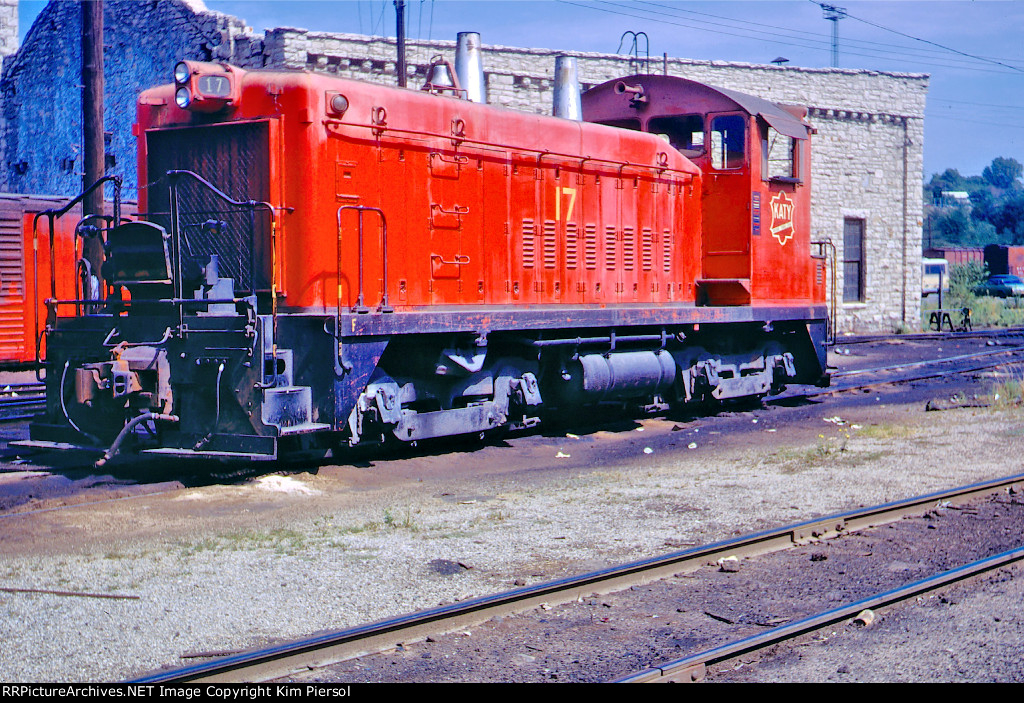
Pictures on the .Net showed that MKT actually had NW-2s that looked very similar to this model. Some had yellow paint on the outside handrails fore and aft. They also had their diesel exhaust stacks painted in silver. See the service yard picture below, of an MKT (later Katy) as a later production EMD NW-2, with bright orange-red paint. Most NW-2s owned by MKT/Katy RR were numbered below 20.

The existing plastic body needed a good dose of Testors'®, Dullcote® spray paint applied, as well as having clear acrylic windows (salvaged from other package material) glued into the cab area. Detail painting of exhaust stacks, and the cab roof, to reflect paint schemes used by MKT, makes the model look like an actual engine used by that RR.
Looks like it will require micro brush painting of the side cab window sun shades, as they are fold-out canvas units, as molded into the model. I also still have to add acrylic plastic, to the cab side windows, as I only installed acrylic clear plastic to the front and rear window sections in the cab.
Some nice features on this model are:
- Cast brass bell, detailed.
- Cast metal horn to cab front center.
- Detailed side panel doors w/ hinges.
- Intake grills on top and front of plastic cast shell.
- Operating metal knuckle couplers.
- Detailed truck side assemblies, cast in metal, and blackened.
The handrails near the steps had a second coat of Gold yellow, FS33538, paint by Vallejo®.
The lower back step from the cab was painted in Panzer Dk Grey, FS34086 by Vallejo®.
The stacks were painted in Silver, Metallic, no. 1921575 by Testors®.
The cab roof was painted in a blend of Panzer DK grey and Grey, FS34424 by Vallejo®
For the sunshades painted above the cab side windows, I used a micro-brush and Grey, FS34424, for the canvas, and Panzer Dk. Grey for steel support rods.
All paints are acrylic, with water clean-up.
Lubrication
When the plastic cab-hood is removed, the top portion of the vertical motor drive unit is visible. A small section of brass is stamped OIL, and is located near the main bearing of this motor. A drop of Labelle® 108 oil was applied there. Most likely, the first drop of oil this motor has seen in 50+ years.
Turning the all metal lower chassis upside down, one sees a gear drive chain, associated w/ the motorized truck/wheels. Using the end of a cotton swab (with the cotton cut off that end), a small amount of lubricating grease (actually 50+ year old rifle grease), was applied to this gear train.
Testing
The O scale layout consists of an oval loop (racetrack), of O-27 track, approx. 30” x 65” in size, mounted on cork roadbed, and super-elevated (read banked) at the 180 degree turns. Think of a Daytona 500 race track.
The track was cleaned w/ 600 grit emery paper, around the loop, for all 710 scale feet. The NW-2 was placed on the track w/ one gondola behind the cab. The gondola has been center weighted with 2 oz. of lead weights super glued below. AC power was applied. The Reversing Unit was cycled thru its Rev.-Neutral-Fwd. cycle and brought up to Fwd. speed (55-65 scale MPH). Results: No power drop outs, no de-rails, just perfect execution of laps. It was stopped just after the one (and only) O-27 turn-out, a manual switch. That switch was thrown, and the engine (cycled to Rev.) moved the gondola through a tight S-curve to its siding. No problem.
“Like a well-oiled machine”
Submitted by Tom Miller, MGMRC V.P.
Originally written 6 Oct. 2020